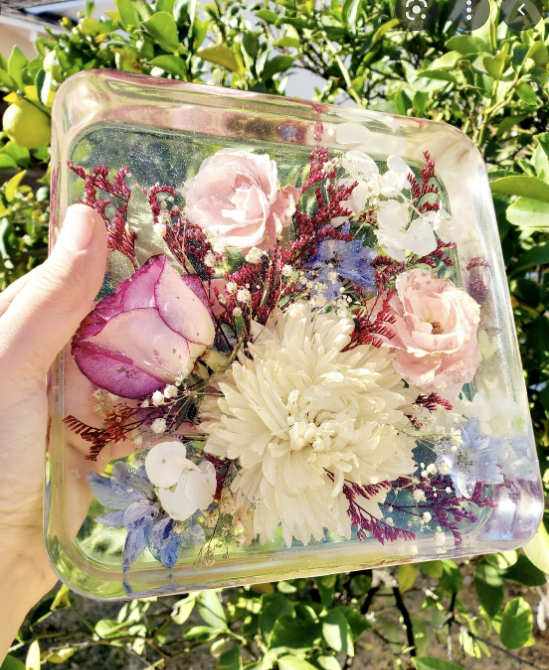
Are you curious about preserving flowers in resin? Preserving dried flower art in resin is a unique and ingenious way to create fantastic one-of-a-kind keepsakes. Next, I’ll take you through how to preserve dried flowers with resin! You can use epoxy to create various projects, including jewelry, coasters, and more. Follow our simple guide to preserving flowers in resin. Once you start, you’ll be hooked!

Table of Contents
Collect the necessary materials to make dried flower resin:
If you try to preserve dried flowers in resin, you will need some other supplies in addition to the dried flowers.
- Dried flowers
- Epoxy resin (1:1 mix of resin and hardener)
- Your favorite silicone molds (e.g., to make jewelry, coasters, etc.)
- Disposable gloves
- Disposable cups
- Wooden sticks (for stirring)
- Tweezers (dried flowers can be very fragile, use tweezers to place the petals without damaging them gently)
- Additives (alcohol ink, mica powder, and gold flakes for embellishing the petals in resin)

5 ways to get dried flowers
The flowers must be dehydrated before they are poured into the resin. If there is moisture in the flowers, they will rot in the resin over time.
You can use the following 5 methods we commonly use to dry flowers. If you use the following methods, please use fresh flowers if possible. Press them firmly and let them dry for 3 to 4 weeks.
- Press the flowers between the pages of the book (place the flowers among the pages, close the pages and let them sit for about a week).
- Using silicone, my primary method of drying flowers, let the flowers dry in a container covered with silicone and let your flowers air dry in 3~7 days.
- Heat an iron (flatten between books and iron with a dry iron).
- The flowers stay between two tiles held together with rubber bands.
- Wooden embosser (two pieces of wood screwed together at the four corners)
Different kinds of dried flowers
When creating floral resin artwork, the flowers you choose are important and different flowers will produce different effects. Therefore you have to choose the right flowers. There are, other than making your own dried flowers, different options.
Buying dried flowers online.
You can go online and buy a pack of flowers that have been professionally dried, and this is one of the easiest ways to get dried flowers without having to wait. Because these flowers are already thoroughly dried, they are ready for immediate use. And they are safe for dried flower resins only.
Advantages ✅
Professionally dried and treated, no waiting and ready to use.
Disadvantages ❌
A single type, which can limit the types of flowers you can use
Artificial flowers
Artificial flowers are also a good choice. This is because it is not affected by decay like real flowers are. This will last the longest when you have finished your resin work using artificial flowers. Artificial flowers have a more vibrant appearance; sometimes, you can’t even tell they are artificial. Of course, many people are very picky about this because they don’t like fake flowers.
Advantages ✅
Does not rot, keeps for a long time, looks bright.
Disadvantages ❌
Not for picky people
Drying your flowers
You can also pick your flowers of the type you want. This has the advantage of saving you money on dried flowers and gives you a sense of accomplishment that the whole process was done by yourself.
Advantages ✅
Save money, get a sense of accomplishment, and get to pick the kind of flowers you like.
Disadvantages ❌
Takes quite a lot of time and effort.
Mixing resin
The first step in preserving flowers with resin is to prepare a resin mix (resin mixed with a hardener). Different brands of resins and hardeners require different ratios and hardening times, so please check the brand instructions before making your ratio. To mix the resin, prepare a disposable cup, pour the appropriate amount of resin and hardener into it, and stir slowly with a wooden stick until the mixture is clear and ready to pour.
After importing, I usually use a heat gun for 1-3 seconds to get rid of some tiny air bubbles.
💡Tips: Don’t stir too fast, or you will create a lot of air bubbles. Don’t worry if you accidentally form a lot of bubbles, check out 13 ways to get rid of bubbles fast here.
Pour the flowers into the resin.
When the resin mix is ready, proceed to step two. First, pour the resin mixture into the silicone mold, then use tweezers to arrange the flowers in the order you like to ensure placement in the mold. When handling the dried flowers, the flowers will usually float on the surface of the resin, do not spill them. If the dried flowers start to float, move them with a toothpick. Usually, the piece is divided into two layers. The first layer will hold the dried flowers, and the second layer will be poured with another layer of resin to encase the dried flowers.
How long does it take to cure?
There is usually a minimum wait of 48 hours for 2 layers of cast resin. To speed up the curing process, we recommend using a heat gun or lighter to eliminate the air bubbles that form when mixing and pouring the resin for the best curing results.
Tips: Temperature is the key to curing. Make sure your environment matches the temperature specified on the resin packaging bottle.
We will demonstrate Casting Flowers in a Resin Coaster and Tray Set (video)
💡FAQ Tips:
Do I need to seal the dried flowers before putting them in the resin?
You do not need to seal them, but please ensure the dried flowers are dehydrated after placing them inside the resin; otherwise, they will rot and turn brown.
Will the flowers turn brown in the resin?
They will turn brown if they are not dried properly before being placed in the resin, which is why I highlighted 5 ways to dry them correctly above. They may rot inside the resin, and the item cannot be repaired
